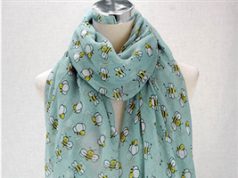
The Drape

See – told you it was easy. You don’t really need step-by-step instructions for this one, do you? Oh, go on then…
- Hang the scarf around your neck.
Pros
- Come on – it really doesn’t get any easier than this.
- You’ll look even cooler if you don’t carefully match up each side centimetre for centimetre – bonus.
- The drape is just the thing to give a more formal look a bit of oomph – no tie required. Simply tuck into your blazer or suit jacket, allowing your scarf to sneakily peek out from under your lapels.
- You can cross the ends over your chest and tuck them into your back waistband to secure your scarf in place and add a bit of extra insulation (N.B. If you’re going to try this, remember – once the jacket comes off, makes sure the scarf does, too – the ‘harness’ is not a good look.)
Cons
- Easily unravelled by strong winds and annoying mates.
The Toss

- Begin with the drape, as shown above.
- Casually toss one end over your preferred shoulder.
Pros
- Will keep you warmer than the ‘standard’ drape.
Cons
- Airy breezes and low hanging branches are not – we repeat not – your friends (see also the drape, above).
The Once Around

- Yep, we’re starting out with our good old friend the drape again. This time, make sure you leave one side longer than the other.
- Wrap the longer side around your neck again.
Pros
- Wind-related mishaps are becoming less likely.
Cons
- You may well be late for work thanks to the additional hour you’ll have spent adjusting your end lengths in order to perfect the ‘too cool to care’ look.
The All Around

Feeling the chill? This look builds on the once around, above, but takes things a step or two further.
- Start from the drape, leaving plenty of extra length on the longer side.
- Wrap the longer side around your neck a couple of times, so that the end hangs down your back.
- Throw the other end over your shoulder – at this stage, you’re sporting the reverse drape – get you!
- Stop here if you like, or go ahead and tuck the ends in.
Pros
- You’ll be snug as a bug in a rug.
- You can rest easy in the knowledge that, however blustery things get, you won’t be slapped in the face by your own accessories.
- Shows off your outfit a treat.
Cons
- Can look a bit odd with a tie.
- If you’re a larger lad, you might end up looking a bit Michelin Man – try a slightly shorter scarf in a lighter weight fabric.
The Ascot

Inspired by the tie knot of the same name, this one is also known as the overhand knot or, slightly less appealingly, the bib.
- Start with (surprise, surprise) your standard drape.
- Cross one end over the other.
- Thread it under and over.
Pros
- Works well with a suit.
- Can be loosened for a more casual look, or tightened for added gravitas.
Cons
- Can appear unnervingly cravat-like – keep it loose to avoid the ‘Best Man’ vibe.
The Fake Knot

This deceptively simple knot is perfect for the guy who wants to make a statement (or cover up a nasty stain on his T-shirt). This is good if you don’t know how to tie a long scarf, as this tie easily gathers up excess material to create something more manageable.
- Drape the scarf around your neck (one end should be longer than the other).
- Tie a loose knot on the longer side by taking the end under and over itself to create a loop, then loosely pulling the end through.
- Thread the other end of the scarf through the loop, too.
- Tighten and adjust.
Pros
- Makes an impression without making you look too polished.
- Will keep you snug when it’s colder.
- Will work on lighter weight fabrics when it’s warmer.
Cons
- Your first few attempts will require a relatively clear head. And a mirror.
The Reverse Drape Tuck
 OK, we’re into intermediate territory now. Don’t panic – you’ve got this. This double-wrap style is perfect for chillier weather.
- Let’s jump straight in from the once around (you know the drill – drape and wrap).
- Now, take one end and thread it through the loop.
- Repeat with the other end.
- Adjust to taste.
- Feel smug (and snug).
Pros
- Works with both casual and formal gear.
- Snug and secure.
- Will make you look pretty darn sharp.
Cons
- Can get a bit bulky if your scarf is unusually wide or thick.
The Reverse Drape Cross

- Take it from the once around again.
- Thread one end over and under the other and pull to tighten (yes, you’re basically tying the ends together – it’s that easy).
Pros
- Looks good worn over a casual bomber or biker jacket.
- Perfect in cold and/or windy weather.
Cons
- If your scarf is a bit on the short side, the ends might end up looking a bit stumpy.
- If your scarf is a bit on the bulky side, you might end up looking a bit like an arctic explorer.
The Four in Hand

Don’t worry – this has nothing to do with the tie knot of the same name. Try this out when you’re ready to get a bit fancy, but beware: kit yourself out in this knot and there’s no getting away from the fact that you are making a statement.
- Follow the instructions given for the Parisian knot, as above, but, this time, only pull the top piece through the loop.
- Twist the loop, creating a second opening beneath the first (a bit like a figure ‘8’).
- Pull the other end through the second loop.
- Tighten and adjust.
Pros
- Warm and (extremely) secure.
- A conversation starter.
Cons
- Can look a bit like a pretzel.
- Can act a bit like a neck brace.


